
Looking for inspiring ideas for DIY memorial keepsakes for kids? Look no further.
We have 3 easy craft projects (with video instructions) that you can make with kids to celebrate the special love they have for grandma and grandpa, or another beloved person who has passed away:
- A colourful and personalized plant marker
- A bookmark with a fancy tassel
- A gorgeous heart necklace
Not only will you and the kids enjoy working on these projects together, these DIY memorial keepsakes make excellent gifts for a special occasion.
If sadly, your kids are dealing with the recent loss of a family member, these DIY craft projects can be a great way to get them involved with the funeral or memorial service as these crafts can be used as decorations or given to funeral guests as a memorial gift.
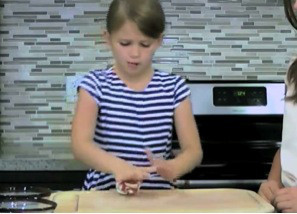
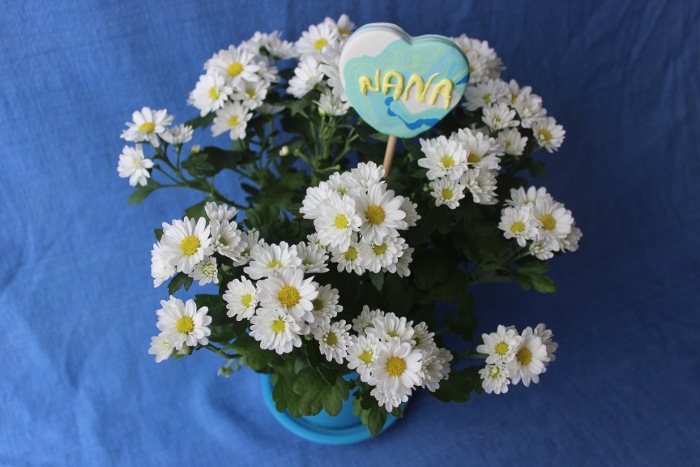
DIY Memorial Keepsake Project #1: Personalized Plant Marker
This colourful plant marker can be used for both potted house plants and for outdoor gardens. It is made from polymer clay that can be purchased at craft stores like Michaels. It comes in a large variety of colours and special effects (for example, glitter or translucent).
For this craft, we chose a heart shaped cookie cutter. However, your kids can make the plant marker into any shape that they wish.
This is the perfect memorial keepsake to celebrate a person that loved gardening. And this DYI craft project is easy (and fun!) for kids of all ages.
Equipment and Materials You’ll Need
To make this plant marker, your kids will need:
- Heart-shaped cookie cutter
- Polymer clay
- You will need 2 or 3 colours to achieve the marbling effect. Choose colours that compliment each other (for example, blue, yellow and white; or green, purple and white)
- Baking tray lined with parchment paper
- Piece of dowel rod or a stick
- The piece of dowel we used for this craft was ¼ inches in diameter. You can also use a stick from a tree, but it needs to be strong enough to support the weight of the polymer clay heart.
- Cutting board
- Sharp knife (or black sharpie pen)
Step-By-Step Instructions For Making the Plant Marker
STEP 1: Instruct the kids to take two different colours of polymer clay and cut a 4 cm cube.
They then should roll each cube of clay into a long, thin tube that resembles a snake. (If your kids are using more than two colours, they should set aside the remaining colours of clay to use later.)
STEP 2: Once the kids have made two different coloured clay tubes, they should lay them on the cutting board, side by side. Have the kids lightly press them together so that they stick to each other.
Next, instruct the kids to pick up the two tubes and start twisting them together. Start at the top and twist all the way down until they reach the bottom.
STEP 3: Once the kids have twisted the two tubes of coloured clay together to form one tube, they should roll it out just like they did in Step 1.
STEP 4: Next, have the kids fold the tube in half and repeat Step 2 by twisting the entire tube from the top all the way to the bottom.
Repeat this step until the kids are satisfied with the amount of marbling they’ve achieved.

STEP 5: If the kids are using a third colour, they can add it in now. To do this, they should roll the third colour out into a thin tube, just like they did in Step 1.
They then want to line this tube against the marbled tube that they already created and press them together. Picking up the two tubes, they should twist them together, starting at the top and working all the way down (just like they did in Step 2).
Your kids should keep folding the tube into two and twisting until they are happy with the marbling effect that has been achieved.
STEP 6: Now the clay should be rolled into a ball and then flatten using the palm of the hand until it is approximately 1 cm thick. (Your kids can also use a rolling pin if they prefer.)
Instruct the kids to not flatten the clay too thin, otherwise the dowel or stick won’t be able to fit within the base of the heart.
TIP: Before your kids use the cookie cutter on the clay, line up the dowel or stick with the flattened clay to make sure that the clay is thicker than the diameter of the dowel or stick.
STEP 7: Once the kids have achieved the correct thickness for the flattened clay, it is time to use the cookie cutter to cut out a shape. (We used a heart shaped cookie cutter.)
Your kids should take the cookie cutter and press it down firmly in the centre of the flattened clay. Gently wiggle it slightly from side to side while pressed down to make sure the cookie cutter has cut all the way through the clay.
Remove the excess clay on the outside of the cookie cutter and set it aside. Carefully remove the clay shape from inside the cookie cutter. (After it is baked, this will be the head of the plant marker.)
Personalize the plant marker by carving grandma’s or grandpa’s name in it using a sharp knife. Alternatively, the kids can write a name by shaping pieces of excess clay into letters and pressing them on top of the heart before it is baked.
If young children are doing this project, for safety reasons do not let them use the sharp knife to carve grandma’s or grandpa’s name.
They will probably also have difficulty forming letters with the excess clay.
We suggest giving young children a black sharpie pen to write grandma’s or grandpa’s name after the clay has been baked and has completely cooled.
STEP 8: Instruct your kids to take the piece of dowel or stick and use it to make a hole in the base of the clay.
It is vital that this hole be made BEFORE the clay is baked. Baking the clay will harden it, making it impossible to insert the dowel or stick.
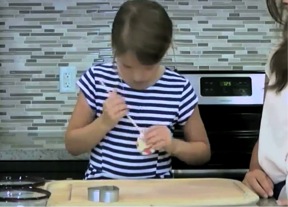
STEP 9: Make sure to remove the dowel or stick before you bake the clay.
To bake the clay, place it onto a baking tray lined with parchment paper and place it in the middle of your oven. Bake at 275 degrees Celsius for 15 minutes (or according to the instructions on the polymer clay packaging).
After you have taken the tray out of the oven, allow the clay to cool for 20 minutes or until it is cool to the touch.
STEP 10: When the clay has fully cooled down, your kids can pick it up and insert the dowel or stick into the hole they created before it was baked.
Now they have a DIY plant marker that they can be proud of!
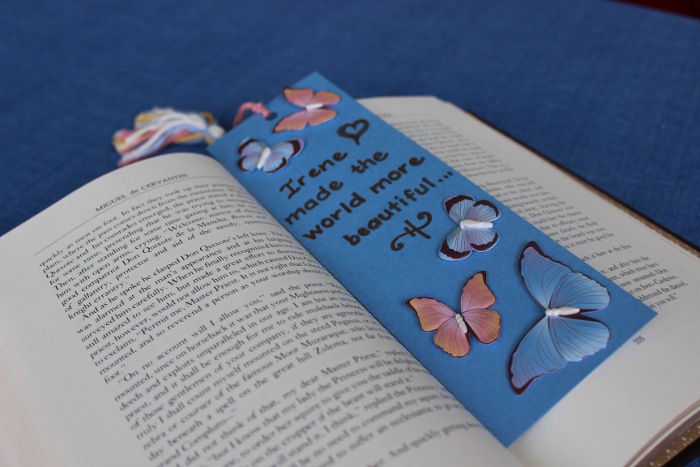
DIY Memorial Keepsake Project #2: Bookmark With Fancy Tassel
A DIY bookmark is the perfect memorial craft for kids to celebrate someone who was an avid reader.
Your kids will love doing this craft project. They can decorate the bookmark with messages, drawings and stickers, and choose their favourite colours to make the colourful tassel.
Equipment and Materials that You’ll Need
Your kids will only need a few materials and tools to make this simple, yet beautiful, memorial keepsake. They will need:
- Card stock (in any choice of colour)
- Ruler
- Pencil
- Scissors
- Decorative stickers
- Fine line pen or marker (in gold, silver, bronze or black)
- Hole punch
- Scrap piece of card stock (this will be used to make the tassel and then discarded)
- Yarn (pick a colour that will compliment the colour scheme of the stickers and the card stock)
Step-By-Step Instructions For Making the Body of the Bookmark
STEP 1: Using a ruler and a pencil, draw the size you want the bookmark to be on your card stock. Cut out the bookmark.
STEP 2: Have your kids decorate the bookmark with stickers and drawings. They may also want to write a personal message using a fine line pen or marker.
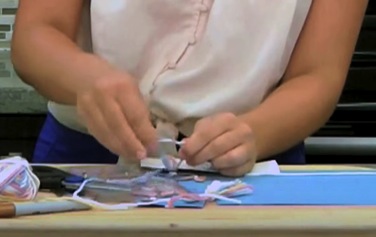
Step-By-Step Instructions For Making the Tassel
The kids will require adult assistance with this part of the craft project. The video focuses solely on how to make the tassel, since is it a little trickier in comparison to decorating the bookmark.
STEP 1: Fold a scrap piece of card stock in half.
STEP 2: Take the yarn and unravel a generous amount. Do not cut the yarn so that you can later adjust the size of the tassel if need be.
STEP 3: Start winding the yarn around the open end of the card stock. The more times you wind the yarn, the thicker the tassel will be.
STEP 4: Once you are happy with the thickness, stop winding the yarn and cut it.
STEP 5: Cut another piece of yarn. (In the next step, you will be using this extra piece of yarn to fasten the tassel to the card stock.)
The longer you want your tassel to dangle, the more yarn you will need. It is a good idea to cut a longer piece that you think you will need, as you can always shorten it later.
STEP 6: Next, take the extra piece of yarn and push it through the middle of the card stock and up to the open end. Make sure that there is an even amount of yarn on either side of the tassel.
STEP 7: Then, holding the sides of the open end together, pull the extra piece of yarn down just underneath the loops of yarn to the folded end of the card stock. The yarn should go over the folded end of card stock, not through the middle of it.
STEP 8: Once your extra piece of yarn is at the folded end of the card stock, tie a very tight knot. Tie a couple of extra knots to ensure that the knot holds and that your bookmark tassel does not fall apart.
STEP 9: Slide your finger into the open end of the folded card-stock and, using your scissors, cut the yarn loops along the opening. This forms the end of your tassel.

STEP 10: Take another piece of yarn and tie a knot around the entire tassel at about 1 cm below the knot you made on the top of your tassel. This forms the top part of your tassel.
STEP 11: Let any excess yarn from the knot made in the previous step drape down into the rest of the tassel strands and then cut it so that the length matches the rest of the tassel.
STEP 12: The final step is to fasten the tassel onto the bookmark. This is a very simple step.
Have the kids punch a hole in the centre of their bookmark. The hole should be approximately 1 cm below the top edge so that the tassel will not rip out easily.
Then pull the yarn through the hole until the tassel is hanging at a length that your kids like. Tie a double knot to secure the tassel.
Now the kids have a DIY bookmark that they can give as a gift to celebrate a beloved grandparent.

Related Articles


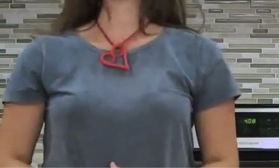
DIY Memorial Keepsake Project #3: Heart Necklace
Making this heart necklace is another easy craft project that kids will enjoy doing.
This beautiful piece of jewelry can be given as a gift to family members or guests at a funeral or memorial service, or a celebration of life ceremony.
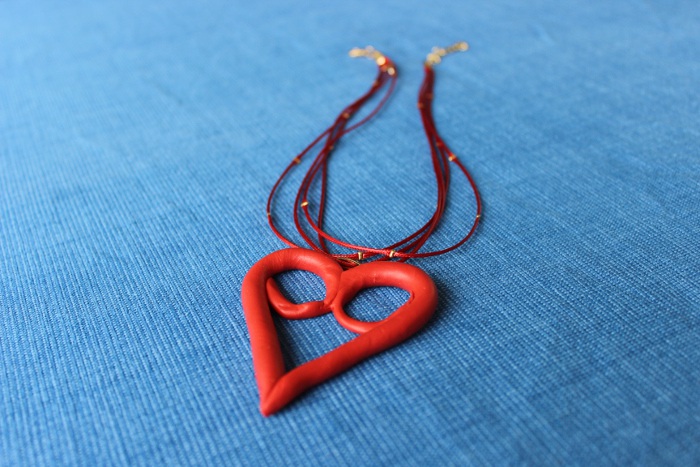
The pendant is a heart symbol intertwined with an infinity symbol, meaning that love is forever. It is one of our favourite DIY memorial keepsakes for kids to make.
Equipment and Materials that You’ll Need
- Red polymer clay (available at most craft stores)
- Baking tray lined with parchment paper
- A necklace chain
- A cutting board
- A knife
Step-By-Step Instructions on How to Make the Heart Pendant
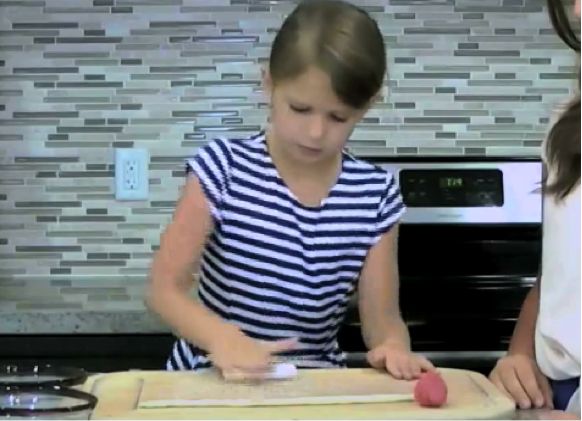
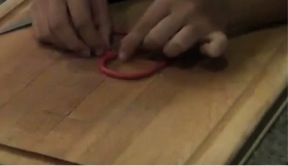
STEP 1: Have the kids warm and soften the polymer clay by rolling it in their hands.
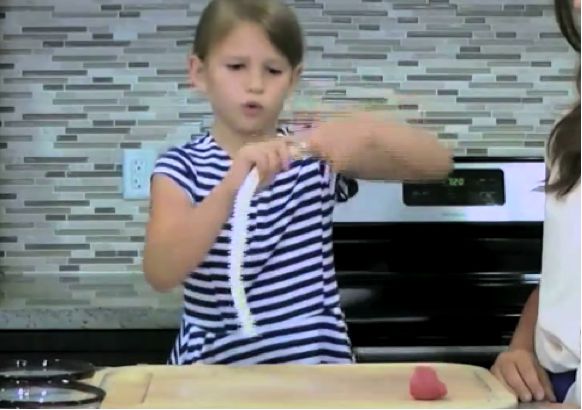
Once it is soft and pliable, pull off a piece and have them roll it into a long tube. The tube should be fairly thin and as even in thickness as possible across the entire tube.
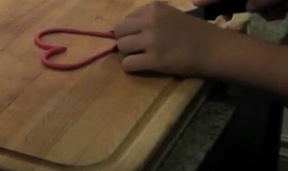
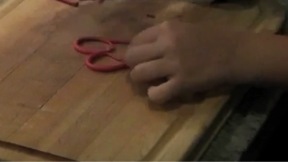
STEP 2: Next, the kids should take the clay tube and make a V shape with it (see the picture below).
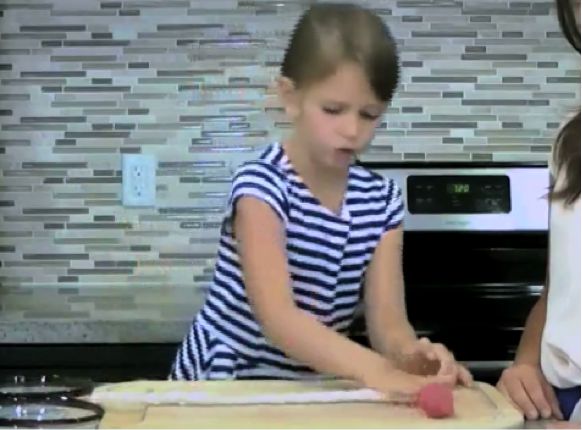
Then fold the two ends of the tube (at the top of the V) into each other so that it looks like the top of a heart.
There might be some excess clay, depending on how large the kids would like their heart pendant to be. If so, simply cut off the excess clay and set it aside.

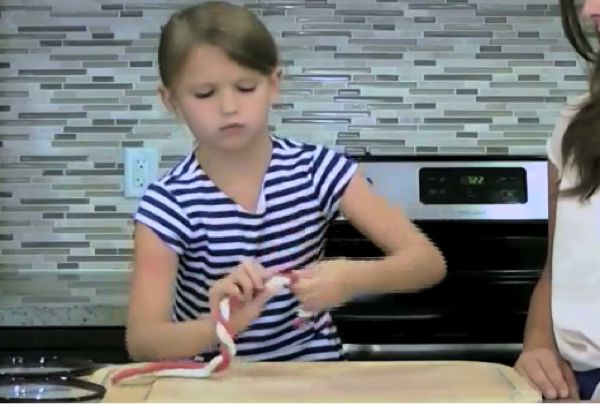
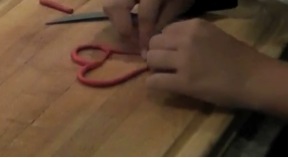
STEP 3: We are now ready to close the two loops that form the top of the heart. An adult should help young children with this step.
First, use a knife to trim each side on a downward angle. Having a straight, smooth edge will make it easier to fit the two loops together.
If the edge on each side is on the same, downward angle, it will also make it easier to join the edges.

STEP 4: Next, connect the two edges by gently pinching them together with your fingers.
STEP 5: Now it is time to refine the shape of the heart at the bottom. (Again, young children will need help with this step since it involves using a knife.)
After Step 2, you will have noted that the bottom of the heart is very round in shape.
To make the bottom of the heart pointed, (so that it looks like the photograph of the final product at the top of the page), use a knife to cut the bottom of the heart in the very middle.
Then line up the cut edges and pinch them together with your fingers.
STEP 6: The kids are now ready to start working on the infinity symbol.
Ask them to take a piece of polymer clay and work it with their hands to soften it.
When the clay is pliable, roll the clay into a long tube that is slightly thinner in thickness than the heart.
STEP 7: Now it is time to form the infinity symbol. (Little ones will need help with this step.)
If you aren’t familiar with the infinity symbol, it looks like a figure 8 laying on its side.
First, cut two short pieces from the clay tube.
To determine the exact length that is needed, put the clay tubes into position inside the heart and then trim any excess with a knife.
Attach each piece of clay to the middle point of the heart and then to the outside wall of the heart, pressing gently with your fingers.
STEP 8: Once you have attached both ends of the infinity symbol, your heart pendant should look like the figure below and is now ready for baking.
STEP 9: To bake the heart pendant, place it onto a baking tray lined with parchment paper and place it in the middle of your oven.
Bake at 275 degrees Celsius for 15 minutes (or according to the instructions on the polymer clay packaging).
After you have taken the tray out of the oven, allow the heart pendant to cool for 20 minutes or until it is cool to the touch.
STEP 10: Once the heart pendant has cooled, the kids should weave their necklace through one of the loops of the pendant.
They now have a “forever love” heart necklace to wear or to give as a gift.
Share Your DIY Memorial Keepsakes With Us!
We hope that you little ones enjoyed making these 3 DIY memorial keepsakes for kids! If you did, we would appreciate a “like” on Facebook.
We would also love to see a photograph of your kids’ creations in the comments box below, along with a line or two about the person who the craft was made to honour. We, along with our readers, look forward to hearing from you.
Don’t forget to follow our Pinterest board for more memorial craft ideas!